Dashboard basics & setup
In the article we discussed all the various ways you can setup Hiveon OS onto your workers and how to add them to your Farm’s dashboard. In this article we’ll continue our introduction to Hive and it’s features and show you how to work with it’s key functions starting with Farms.
Working with Farms
Farm is a group of workers that you combine together to form a separate project. For example, you can have a separate Farm for all your workers or you can create several Farms for different groups of workers within a location, for example, a data center, like "1st floor rigs", "2nd floor rigs", "rigs on East str", etc. The number of Farms per account is unlimited, both yours and those which access was shared with you by other users. Other users can share access to their Farms or even transfer them wholly between accounts. This way it’s easy to set up an entire farm for a client and then transfer full ownership to his account. You can even organize your own farm setup business, if you desire.
Creating a Farm
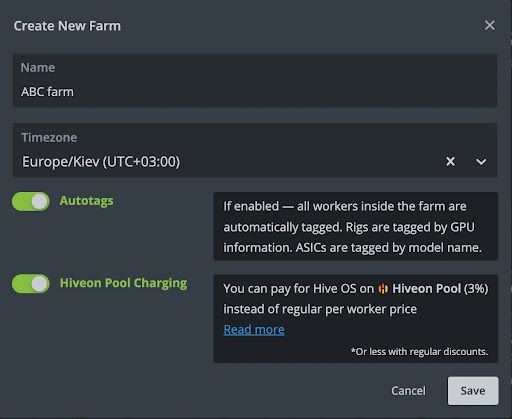
Start by clicking the plus button in the top right corner of your dashboard. A Create New Farm window is displayed. Here, give your Farm a name and select a time zone. This should be the time zone in which your workers will be located. This is required for the purpose of displaying the proper log time codes. Once done, click Save and you will be transferred to your new Farm’s dashboard.
Farm Access Levels
There are several access levels to a Farm and you can see them at the bottom of the each Farm in the dashboard.
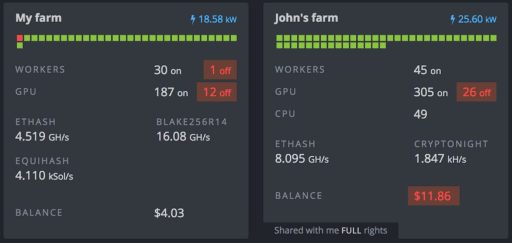
You can give access to your Farm to other users. For example, you could give Full Access privileges to your admins in order for them to manage everything in your stead. Or you can give the read-only Monitor access privileges to your technical staff that do simple maintenance and monitoring and nothing more.
Each next level includes permissions from the previous one.
- Monitor — Monitor and Stats, Rig details. Tags can be assigned to limit rigs visibility for trusted account.
- Tech — Overclock, Reboot and Shutdown, Upgrade.
- Rocket — Apply miner and wallet to worker. Create and delete workers.
- Advanced — Execute commands, VPN, Wallets, Tuning.
- Full Access — Password, 2FA, Notifications, Payments, Ownership.
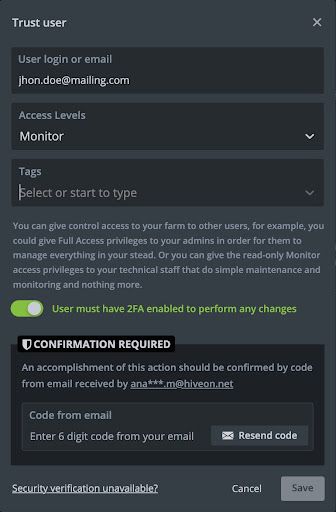
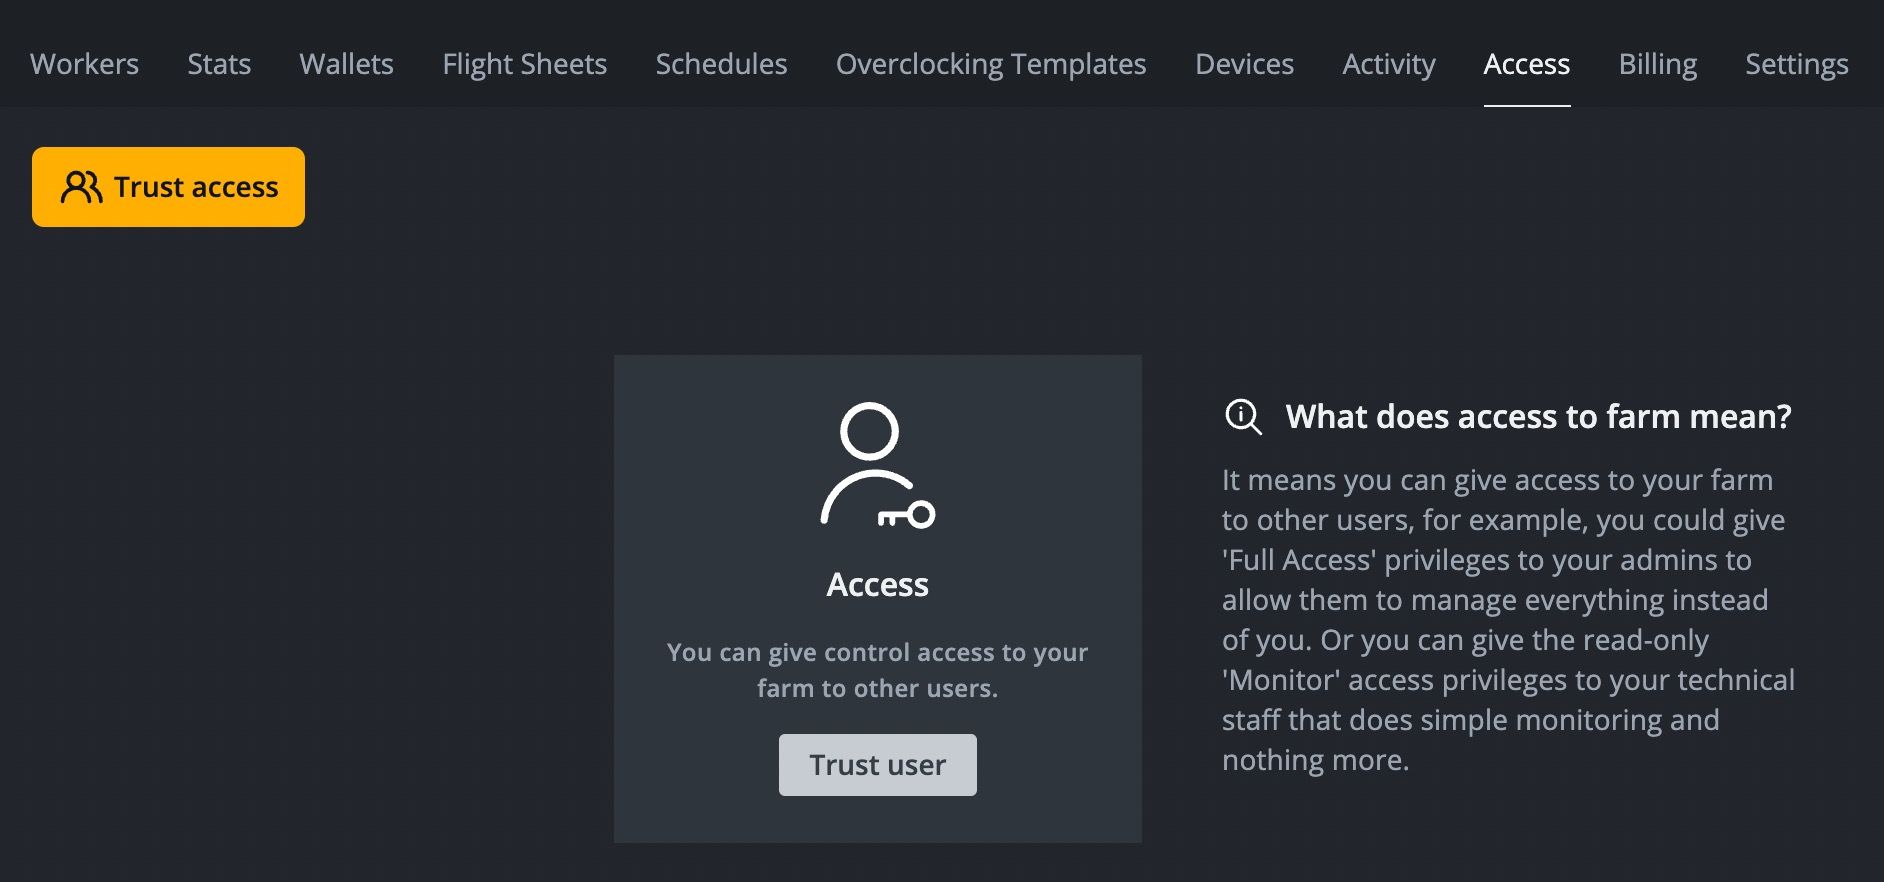
You can give access to your Farm to another user by navigating to the Access tab and clikcking Trust access. Next, enter the user’s login, this should be their Hive account login. Select an access level for them from the drop down menu. If you’ve selected the Monitor level, then an additional field with Tags will be available. You can share only the workers with selected tags to limit visibility of your other workers. To finalize granting an access process, enter a verification code sent to your email and click Save.
Setting-up Wallets
Now that you’ve got yourself acquainted with Farms, you can start setting up your Wallets. Several wallets can be created for any coin you like. In fact, if you plan on mining multiple coins, we suggest creating different wallets that you can later pair with different miners and different pools. When selecting a coin to mine in Flight Sheets, you’ll see that depending on the coin you choose, the selection of wallets will be limited to that specific coin.
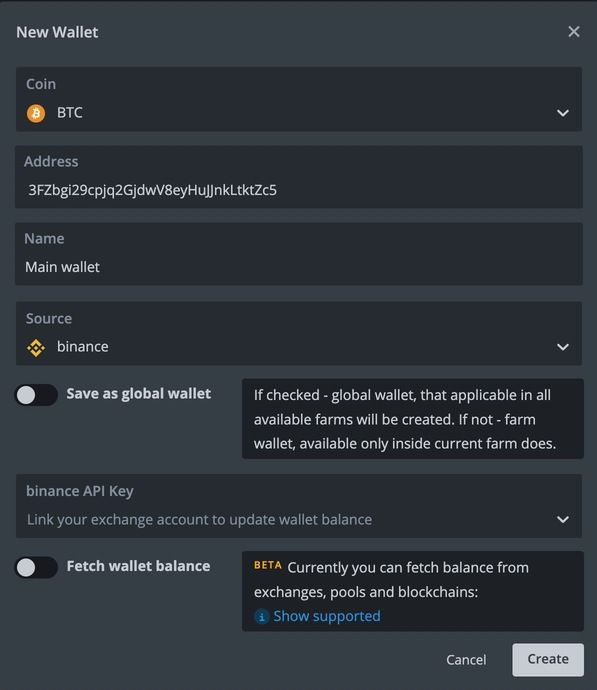
To add a new wallet, go to the Wallets tab and click the Add Wallet. You’ll see a pop-up window with the following fields:
- Coin — choose a coin for this wallet from the drop-down list.
- Address — enter your wallet address.
- Name — use a name that will describe the wallet’s purpose best.
Click Create to save your new wallet.
Once you have finished creating your wallets, go to the Flight Sheets tab.
Setting-up Flight Sheets
Flight Sheets are your worker’s configuration files that determine its operating mode. Flight Sheets let you create worker settings presets and switch between them on the fly with a few clicks. You can create several combinations of coins, wallets, pools and miners and switch between them on the fly.
When adding a new flight sheet, note that you can only select a coin first, while the other options are grayed out. This is done for convenience. Once you select a coin, you’ll be able to pick a wallet from the list of your pre-created wallets which we added earlier. The selection of wallets will also be limited to those that are associated with the previously selected coin. Same for pools and miners, you can only see those that are associated with that specific coin.
Creating a Flight Sheet
In the Add New Flight Sheet section, start filling in the following fields:
- Flight Sheet Name — use a name that will describe the Flight Sheet’s purpose best.
- Coin — this works like a filter, you can see only wallets, pools and miners only for the chosen coin.
- Wallet — choose a wallet for this Flight Sheet. These are the wallets you created in the Wallets tab.
*Pool — a pool on which you’ll be mining. Choose a pool from the drop down list. A pop-up window will show up with settings. Additionally, you can change these settings later by clicking Configure Pool. *Select Pool Server — a list of available pool servers.
- Email — your pool account email. This option is available on some pools that authenticate users via email, others might not have this setting.
- Miner — choose which miner will be used with this Flight Sheet. Click the Setup Miner Config for miner specific settings. You should consult your miner’s documentation for additional details.
Once you’re done, click the Create Flight Sheet.

Selecting Pool servers
One thing to note about the pools is the order in which you choose the servers. Let’s use dwarfpool as an example and say you choose the EU server. The next servers you pick are the next servers your worker will connect to, in case it loses a connection to the EU one, in the order you picked them. For Example, the first server you chose was the EU, then Switzerland and then China. This will be the exact priority order in which your worker connects to that pool.
Setup miner config
The miner config window will vary depending on the miner you choose. As mentioned before, the selection of miners is limited by the coin chosen. Miners will have Nvidia, AMD or CPU text indicating its compatibility with specific hardware types. This means, if a miner has only Nvidia next to it, then it will work only on Nvidia GPUs, same with AMD and vice versa. CPU indicates that a miner can be run on CPUs.
These parameters can be left alone and the miner will work in its default settings. You may want to change them if, for example, pool servers weren’t selected in the Pool tab, then these settings can be set in the miner config. These are custom settings fields that you can use to override specific parameters, like forks, pool address, wallet strings or hardware config override parameters. We suggest referring to your miner’s documentation for further details.
Once you’re done, click Create Flight Sheet. Remember, you can have any number of Flight Sheets in your Farm.
Example: Setting-up Monero on Nicehash
Now that we showed you how to set up your worker, let’s put it to practice by setting-up Monero (XMR) on Nicehash using the CryptoNoghtv7 miner algorithm as an example.
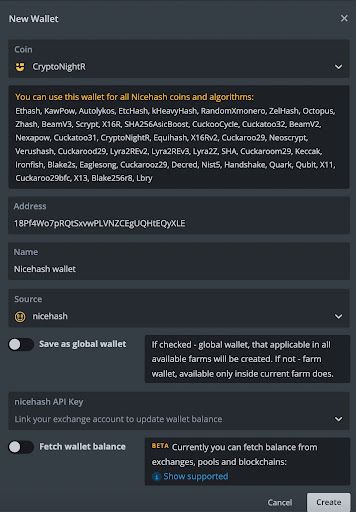
Go to your Wallets and click Add Wallet. In the New Wallet window, start by typing nicehash into the Coin field, and you should see an entire list of various Nicehash supported algorithms. They are not listed by default in the dropdown list as they’re not actual coins per se. Choose the Nicehash-CryptoNightR protocol, then enter your Nicehash wallet address. Note, that if you want to see your stats in the Nicehash Dashboard, you should use the generated wallet address provided during the registration. You can name your new wallet optionally, then click Create.
Continue by setting-up a Flight Sheet in the Flight Sheets tab. Choose the now available Nicehash-CryptoNight from the Coin dropdown list, then choose the wallet you just created and select a pool. Keep in mind that you can either choose the default pool servers, or select the Configure in miner option to input these settings manually. Select your preferred miner or if you clicked the Configure in miner option, then setup that miner manually by clicking Setup Miner Config.
Adding a second miner
To add a second miner to a specific worker, go to a specific worker and click the Flight Sheet tab. Then, select your current Flight Sheet and click the triple dot button and then Edit. Click Add Miner and start filling in the fields:
- Coin — Nicehash-CryptoNightV7
- Wallet — the wallet we created using our Nicehash deposit address
- Pool — Configure in miner
- Miner — we chose the
cpuminer-opt

Because we decided to choose our server and miner settings manually, we need to configure these settings via the Setup Miner Config window. Click Setup Miner Config button in Miner and fill in the following fields:
- Hash algorithm — choose
cryptonightvr — Monero (XMR)from the dropdown list - Wallet and worker template —
%WAL%.%WORKER_NAME%:xthese template parameters will automatically substitute, so we leave them as they are - Pool URL —
stratum+tcp://cryptonight.eu.nicehash.com:3355our server of choice - Pass —
xa default setting, left as is - Config override —
“threads”: 4 “cpu-affinity”: 0
Note that the threads number will vary depending on the number of cores your CPU has. In our case it’s 4. Generally Config override can be left blank in most cases.
- Click Apply Changes and you’re all done.
For more details regarding Nicehash and it’s fine tuning, please refer to their Help section.
Continue following the instructions below to apply your newly created Flight Sheet to your worker.
Start mining
You can now apply the Flight Sheet you’ve created. You have two options of applying the Flight Sheet to your worker. First, by going to your Workers tab then choosing a specific worker and going to the Flight Sheet tab in a worker’s menu and clicking the rocket button on the right side of the specific Flight Sheet you want to apply.
The second way is by going to the Workers tab, then clicking the checkboxes on the left side of the workers to which you want to apply the Flight Sheet. You should see a rocket icon appear in the menu bar in the top right corner.
![]()
Click it, and you should see a window with the number of workers you chose and a list of all your Flight Sheets.
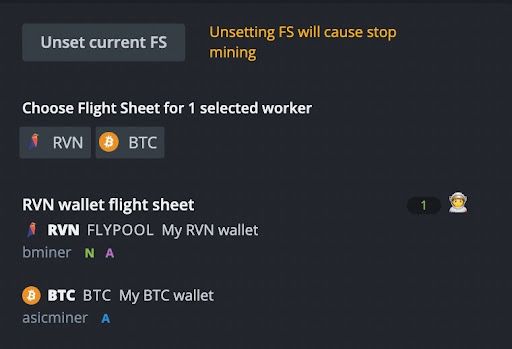
Choose the Flight Sheet you want to apply and click Apply. You should see a message telling you that the Flight Sheet command was sent to the worker. In a few seconds your workers should apply the changes and you should see a Config applied message in the activity logs in the farm’s Overview tab.

You’re all done! Your rig should start mining, sending data to your dashboard, and you can view the metrics in a real-time.