How to start mining on Hiveon Pool
Are you going to start mining on Hiveon pool? Great! To make your life easier, we prepared a guide on how to switch to Hiveon pool, for both Hiveon OS and Windows users. Keep reading to discover more. Before we start, let’s learn more about the Hiveon Pool.
What is Hiveon Pool
Hiveon pool is mining pool for cryptocurrencies. It is based on the PPS+ system, which leads to guaranteed, high income.
Supported coins in Hiveon Pool
You can use the Hiveon pool to mine the following coins:
- RVN
- ETC
Hiveon Pool Advantages
By mining on Hiveon, you can connect to servers all over the world. Whether you live in the United States, Europe or Asia, you can be sure to be connected to a server near you. A single pool address will make your task easier - this way Hiveon picks the nearest server automatically for each of your miners.
The PPS+ rewards system, on the other hand, assures guaranteed, stable payouts.
Hiveon Pool Fee
When you mine on Hiveon, you pay no commissions. Pool charges 0% commission, including MEV.
When mining with Hive Pool, you can also choose to pay for Hiveon OS if you are using a paid plan. We will then charge you 3% of your mining profits.
If you are a Hiveon OS user
Step 1: Create a Wallet
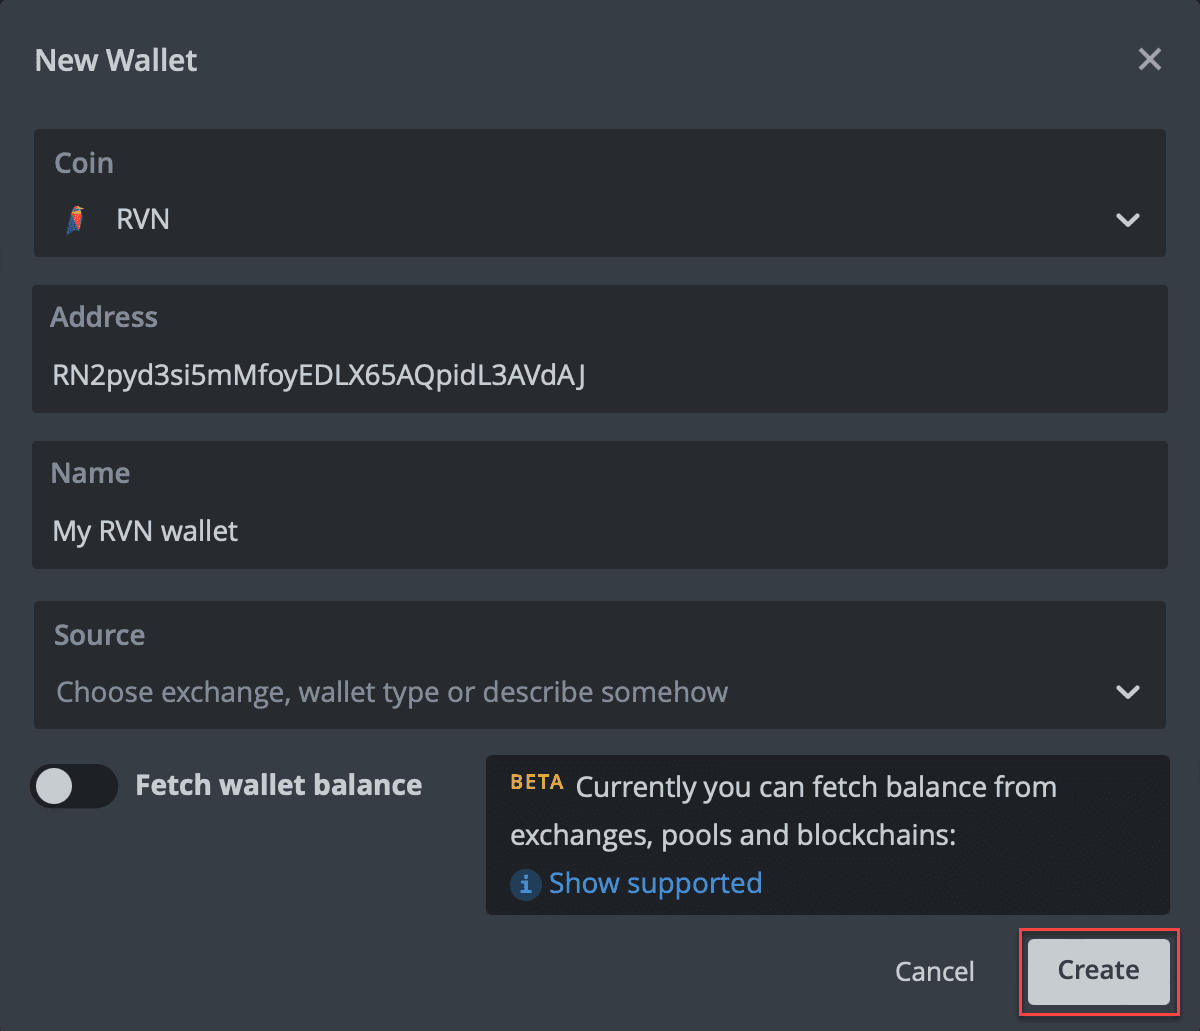
To mine a crypto coins on Hiveon mining pool, you should first create a wallet. To do this, log in to the system, go to the Wallets tab and click the Add Wallet button. Specify a coin, the address, the name and the source.

When you are done, click Create. And your wallet is ready!
Step 2: Create a Flight Sheet
To create a Flight Sheet, go to the Flight Sheets tab. You will see the following:

Now it is time to fill the fields:
- Coin: choose the appropriate coin
- Wallet: choose a wallet created for this coin
- Pool: choose Hiveon from the dropdown list
- Miner: choose your preferred miner
- Name: enter the name for your Flight Sheet (that’s optional)
Click Create Flight Sheet.
Step 3: Apply the Flight Sheet to your worker
There are two ways to do this:
Option 1: Go to the Workers tab, choose a specific worker, and then go to the Flight Sheets tab in the rig’s menu. Click the rocket icon in the top right corner.

Option 2: Go to the Workers tab and mark the check boxes on the left side of the chosen rigs. Again, click the rocket icon.
After you click the rocket, you will see a window with the number of your chosen workers and a full list of your Flight Sheets. Choose the created Flight Sheet and click Apply.
Then you will see a message saying that the command was sent to the worker (or workers). In a few seconds, your rigs will apply the changes, and you will see the Config message in the activity logs:

Now everything is ready! Your rig will start mining and sending data to the dashboard. You will be able to follow its performance in real time
If you are a Windows user
In case you mine on Windows without using Hiveon OS, please follow these steps:
Step 1: Get a package file
We have prepared a set of package files for the most popular miners.
⛏ Recommended miners⛏
🧪 All these miners have been thoroughly tested and consistently come out on top in terms of stability and performance:
✅ TeamRedMiner | lolMiner for AMD GPUs.
✅ lolMiner | T-Rex | GMiner for Nvidia GPUs.
✅ lolMiner for Hybrids workers (AMD+Nvidia GPUs).
Choose the package file for your miner and copy it to the folder with the miner.
Step 2: Open the file
Open the file with a text editor (Notepad++) and write your data there:
-
Your wallet instead of
PUT_YOUR_WALLET_HERE. -
If necessary, enter the name of your worker in
WORKER_NAME. -
Depending on your coin, use the following auto servers to connect to the pool:
ETC coin
etc.hiveon.com:8888
etc.hiveon.com:4444
RVN coin
rvn.hiveon.com:8888
rvn.hiveon.com:9999
Now save the file, launch it and start using Hiveon pool. Happy mining!
If you have any questions on Hiveon pool, get in touch with our customer support team by [email protected].