
How to overclock your ASIC
Let's assume that you have downloaded and installed the Hiveon firmware on your devices. What now? How to overclock them? To do this, follow these steps.
If the Hiveon OS system is installed on your ASICs:
1. Log in to your Hiveon OS account.
2. Enter a farm, then go to the Workers tab.
3. Select the ASICs that you want to overclock.
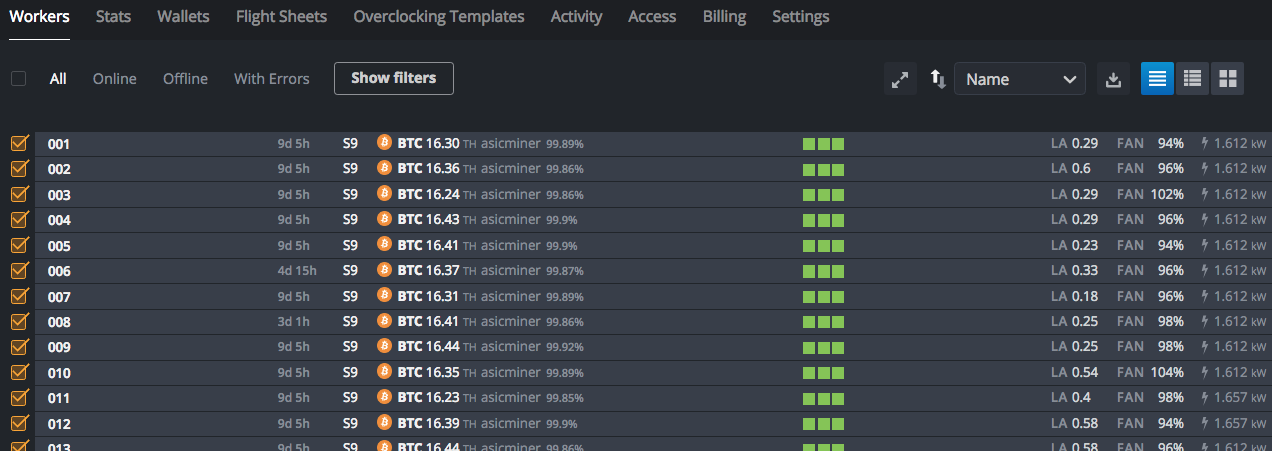
4. Click this icon — you can find it in the upper part of the screen, in the toolbar.

5. Select the required overclocking profile and click Apply Changes.
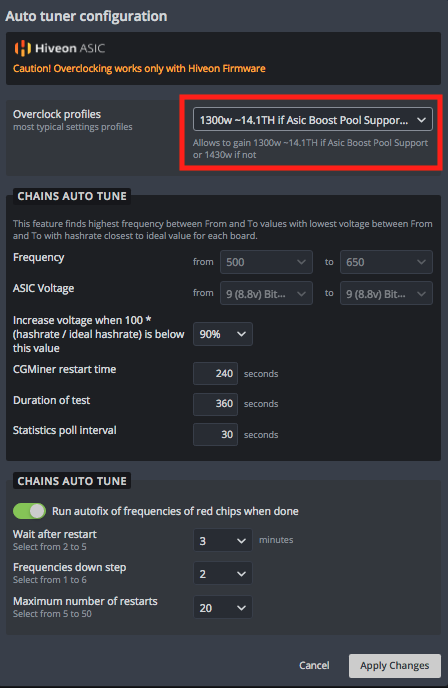
6. Wait a bit. Autotuning can take from 30 minutes to 6 hours, everything depends on the “level” of wear of the chips and boards. During this time, autotune will select frequencies to ensure optimal ASIC operation and achieve a hashrate close to the chosen profile. During the autotuning process, the current hashrate can fluctuate greatly — this is normal.
If the Hiveon ASIC firmware is installed, but for some reason you do not want to connect your ASICs to your Hiveon OS personal account for remote control, you can overclock the device through its web interface:
1. Go to the web interface of the ASIC using its IP address. The IP address can be found in the router or with the help of a special program, for example, Advanced IP Scanner.
2. Enter the standard login and password of our firmware:
Login — root, password — root
OR
Login — root, Password — root@ (make sure there is an @)
After this you will get to the web interface window:
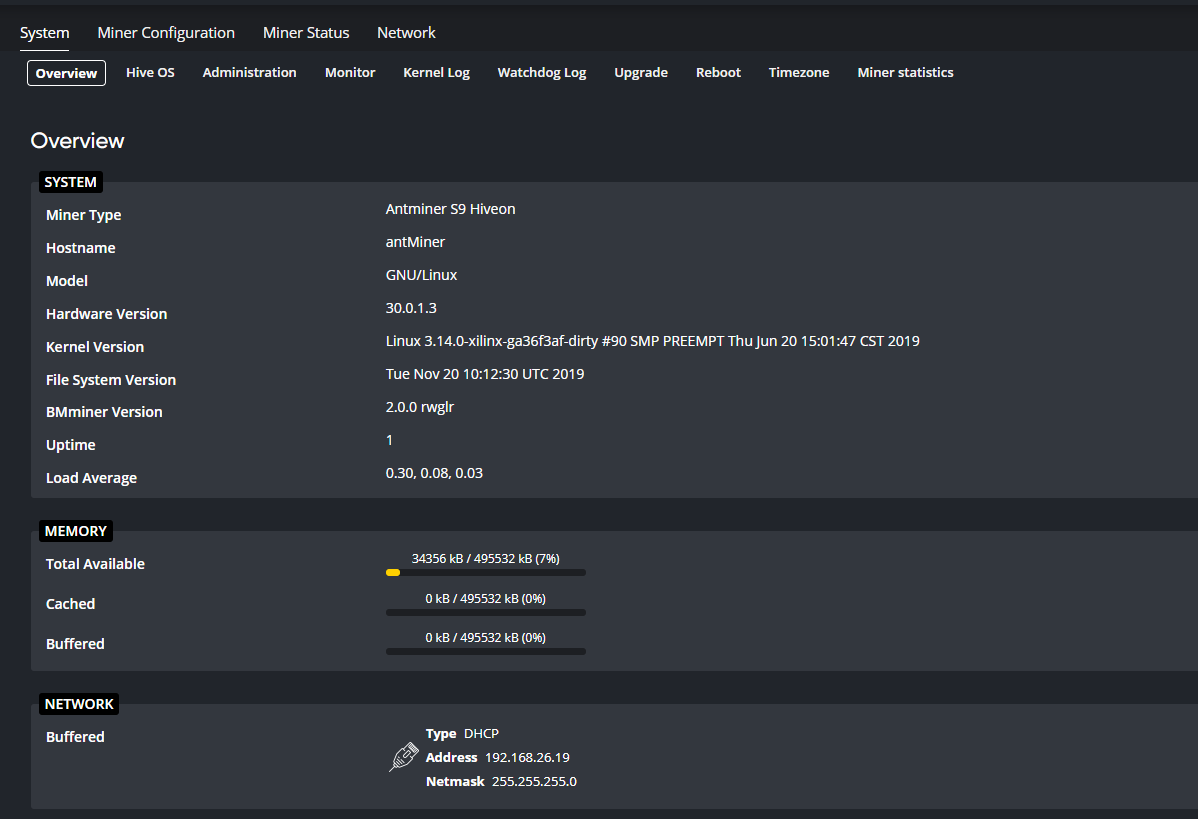
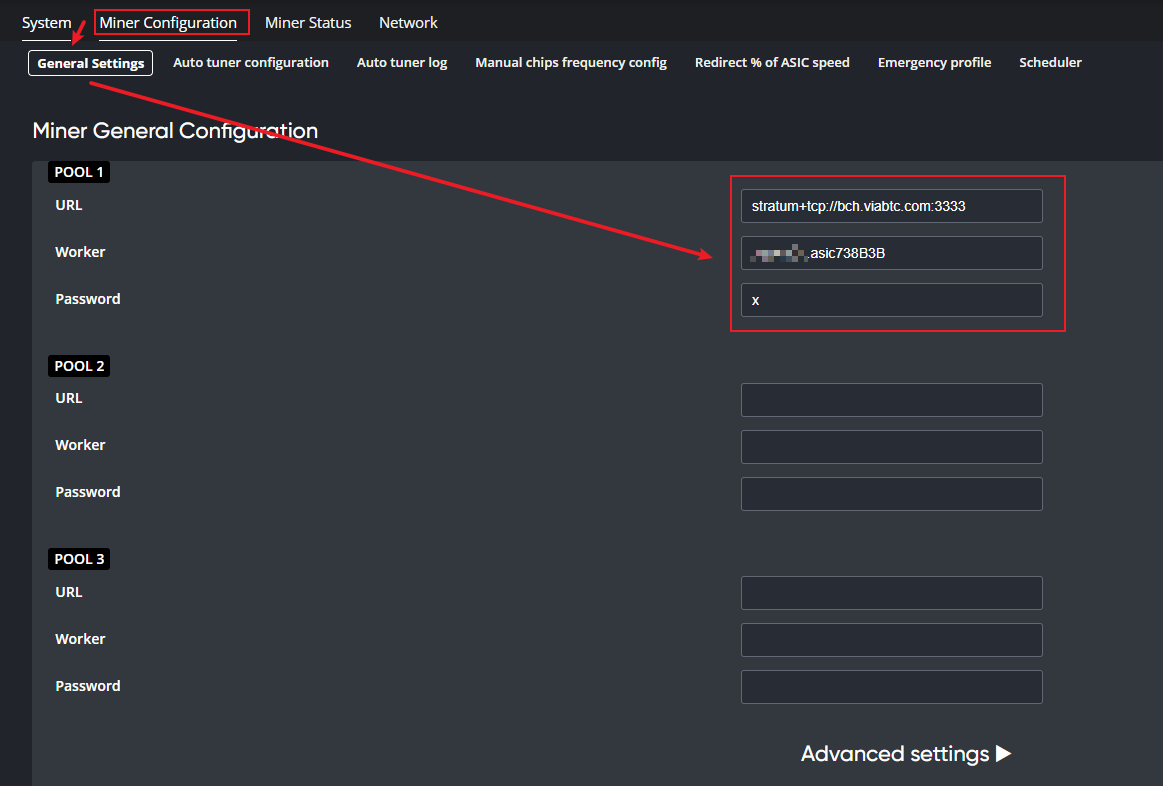
3. Go to the Miner Configuration tab, then to General Settings. This will give you the opportunity to configure your ASIC to your pool and wallet / login on the pool.
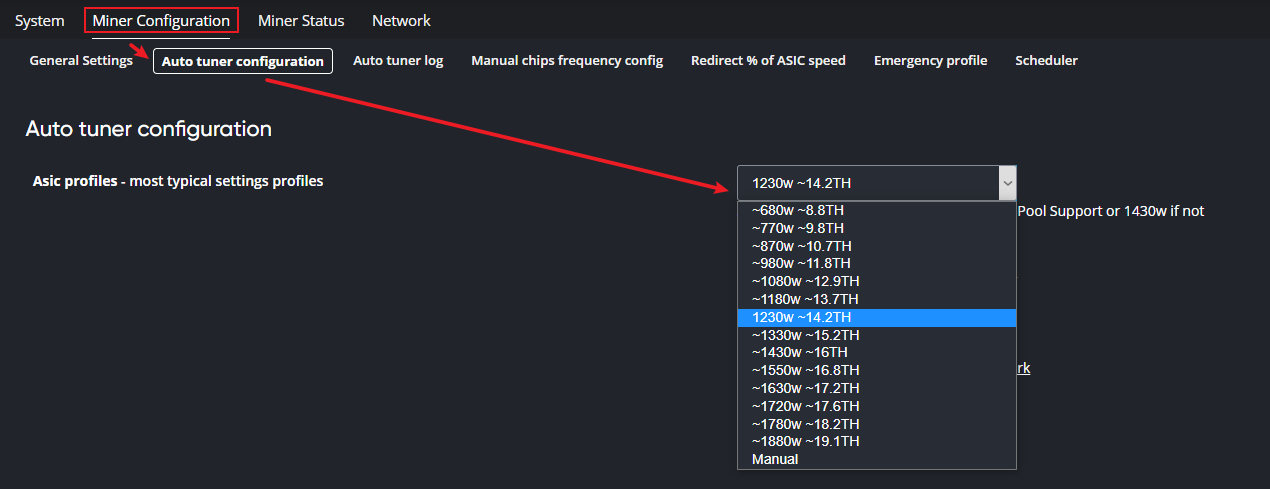
4. In the Auto Tuner Configuration tab, select one of the available overclocking profiles. You can also select the Manual option and set up the boards on your own (this option is ONLY for experienced users).
In the Auto Tuner Log tab you can check what autotuning is doing at the moment:
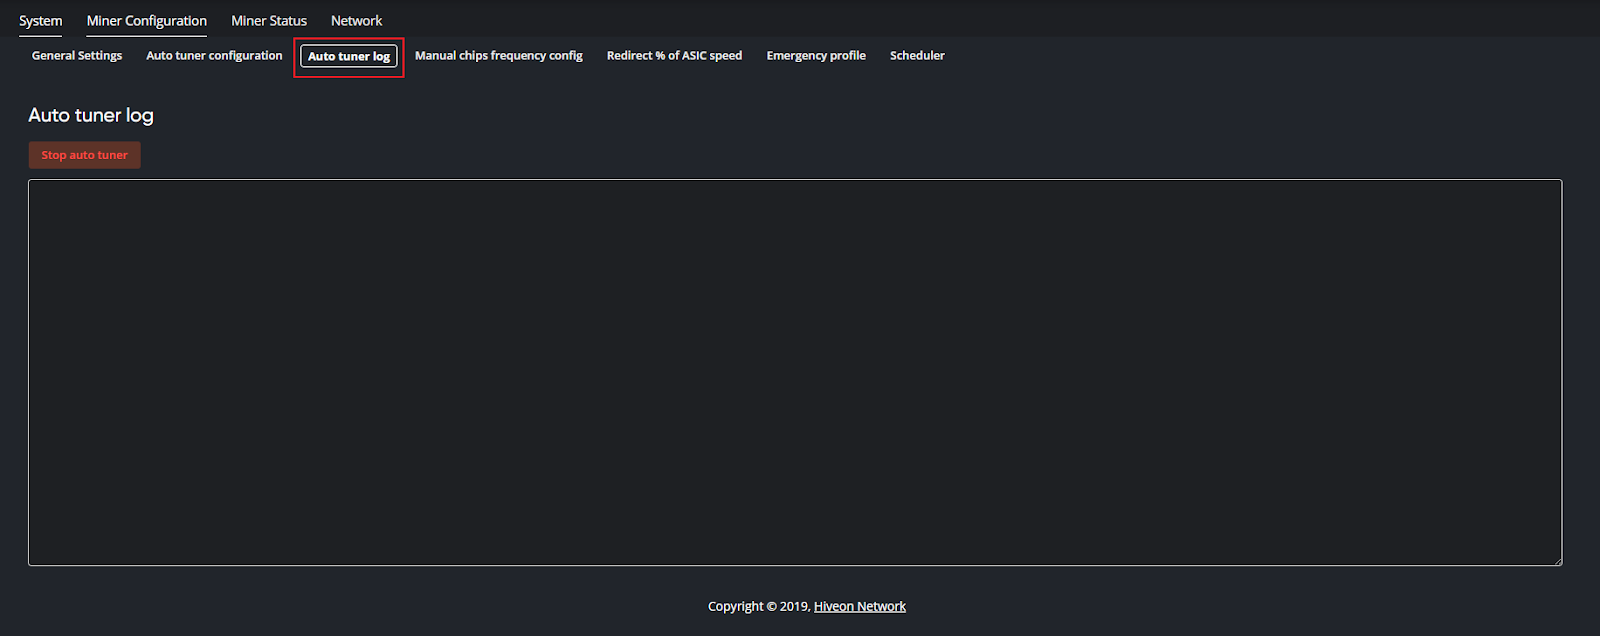
Remember that autotuning will take some time and that the current hashrate may fluctuate.