You can now rent your GPUs for AI workloads directly from Hive OS through Clore-rentals.
Follow these steps to connect your Clore account, set up your flight sheet, and keep your rigs earning — whether they’re mining or handling AI jobs.
1. Sign In or Sign Up
- Go to clore.ai and sign in or create an account.
2. Create a Flight Sheet
- In your mining platform, go to Flight Sheets.
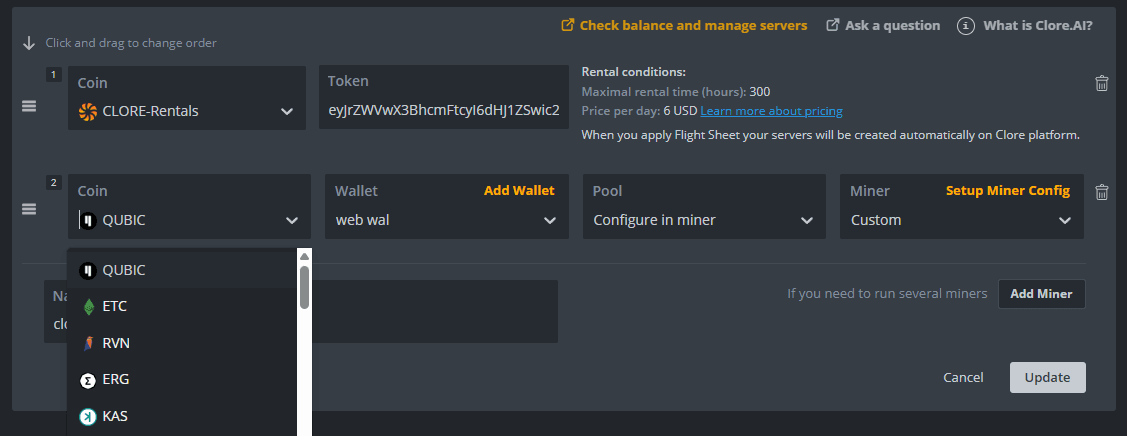
- Under the Coin dropdown, select CLORE-Rentals.
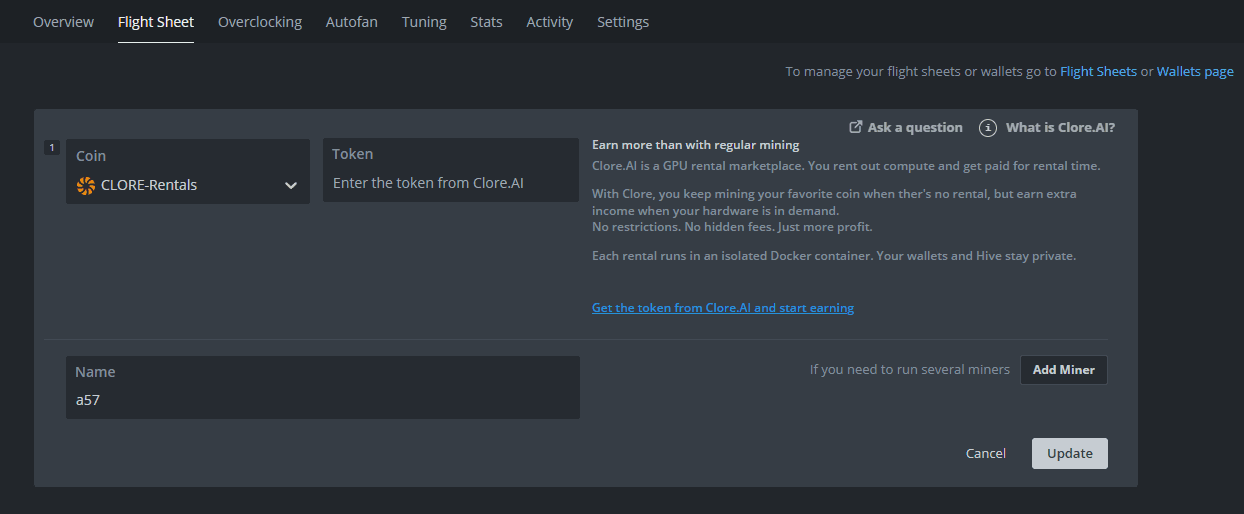
3. Set Up Your Rental
- Click the blue link next to the coin selection.
This will open clore.ai in your browser.
.png)
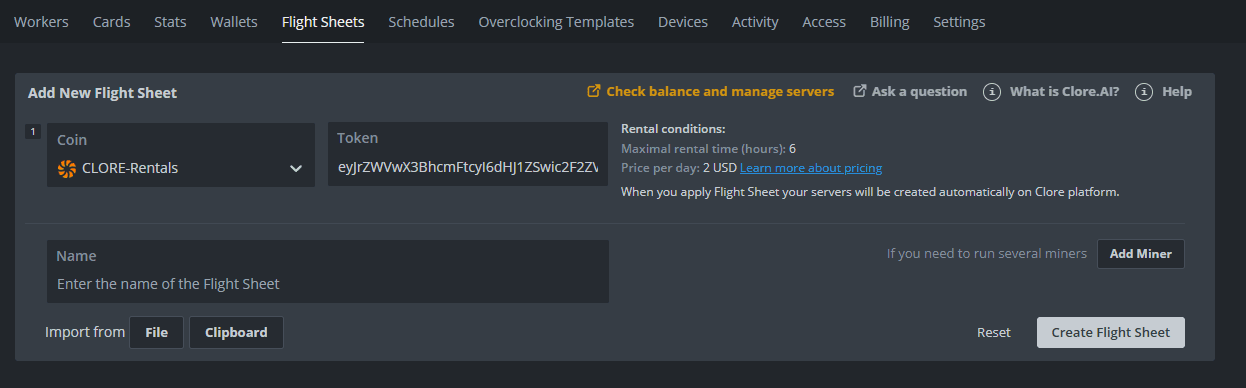
- On Clore.ai, set your price and rental duration.
- Click Apply.
4. Return to the Flight Sheet
- After clicking Apply, you’ll return to your flight sheet configuration.
You should now see the token and rental info automatically filled in.
- Apply flight sheet to worker
Note: During an active Clore rental, the rig uses overclock settings defined on clore.ai. When the rental is inactive and the rig switches back to mining the second coin in the flight sheet, Hive OS overclock settings apply as usual.
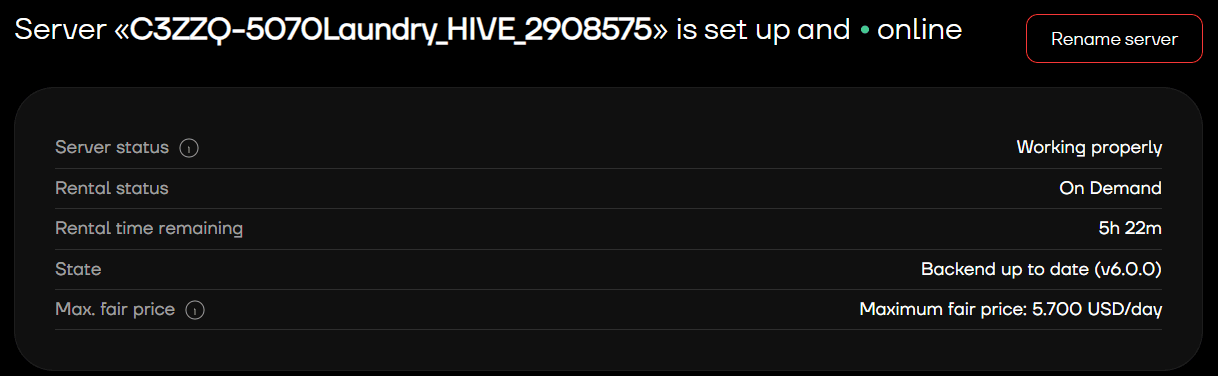
5. Monitor Your Rental
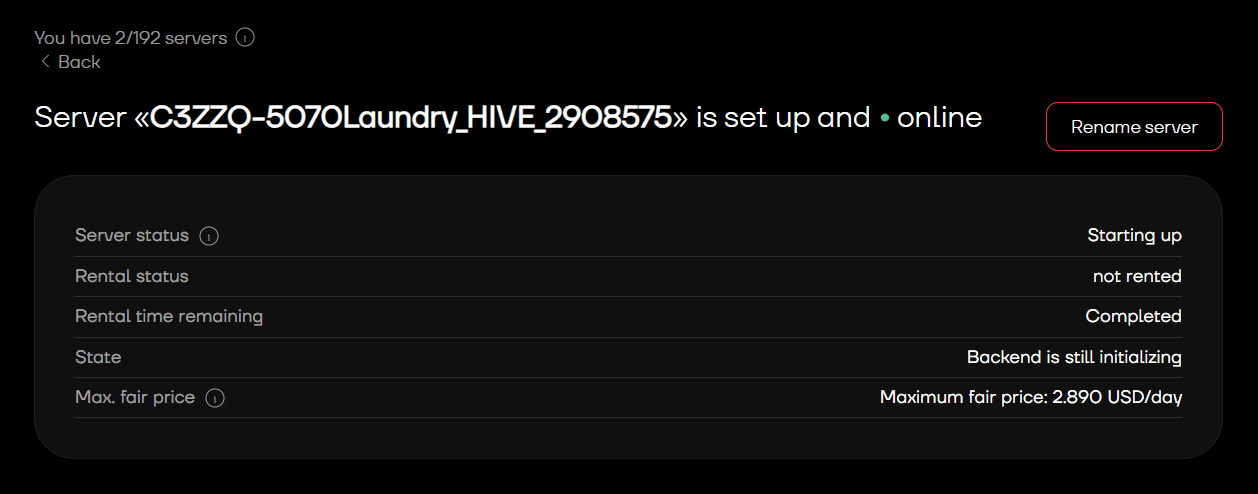
Once your server is rented, you’ll see the status change to reflect the active rental.

6. Add Miner in Flight Sheet
- Click Add Miner, and fill out the flight sheet as you normally would, finish by clicking Update
- This miner will be ran when machine is not rented
That’s it. Clore-rentals will always take priority in your flight sheet — when there’s AI demand, your rig rents out automatically; when it ends, it switches back to mining.
No downtime. No manual switching. Continuous earnings.
Try it now