


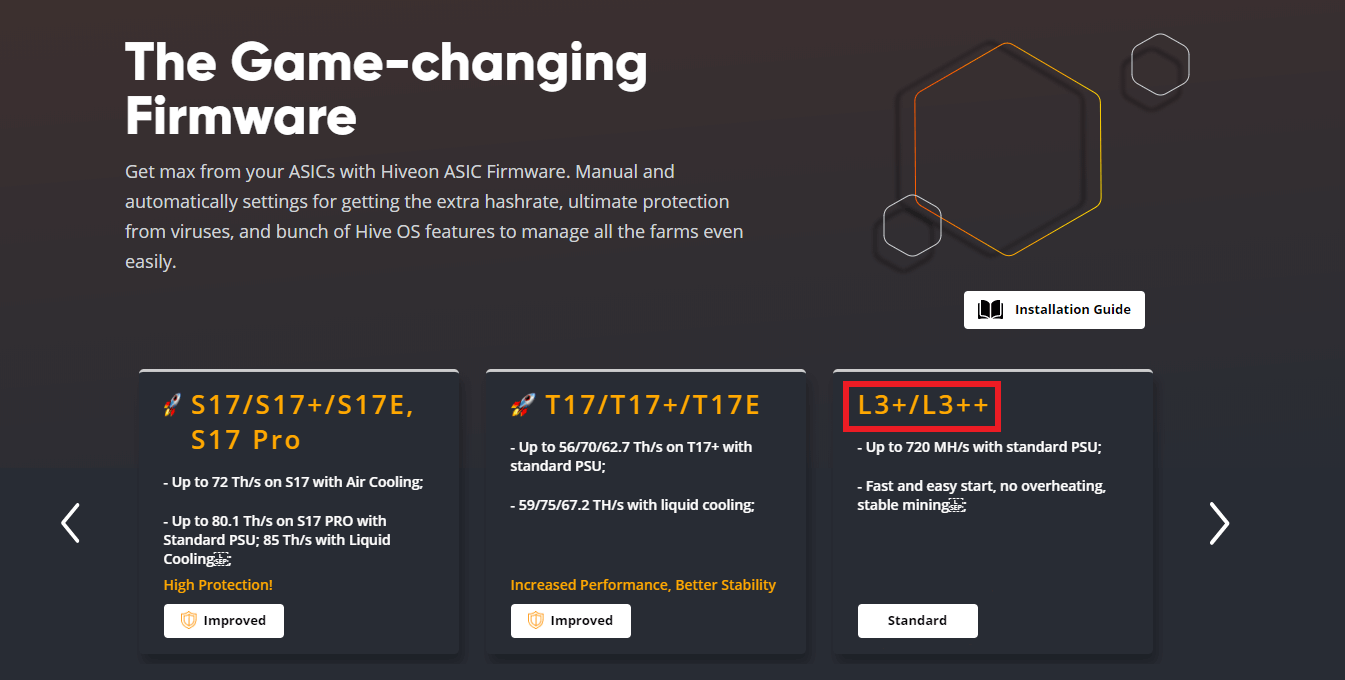
Installation guide L3+/L3++
Installation options
There are no one-size-fits-all instructions, instead we’re going to cover three scenarios of installing or updating your machines with Hiveon ASIC. The following topics will be covered:
- Installing using ASICs via web interface — suitable for installing on a handful of machines for users who haven’t used Hiveon OS before;
- Bulk installation — suitable for installing unto entire farms;
- Updating existing ASICs via Hiveon OS’s web interface — suitable for those who’re already using Hive with their ASICs;
- Bulk updating existing ASICs — suitable for updating entire farms in a few clicks.
Option 1: Installing using ASIC’s web interface
Go to this page and download the firmware:
When your ASIC is powered up and assuming it’s on the same network with you, connect to it using a computer or a mobile device. Enter your miner’s IP address. Most miners come with DHCP enabled thus you do not have to manually set an IP address, for it. Instead look at the IP table on your router or use a scanning tool.
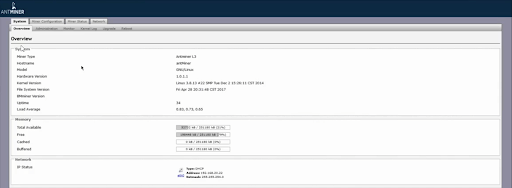
Log in into the miner. The default username login is root and the password is also root. You’ll be logged in the system overview window. If this is your first time setting up an ASIC don’t forget change the password from the default in the Admin tab first.
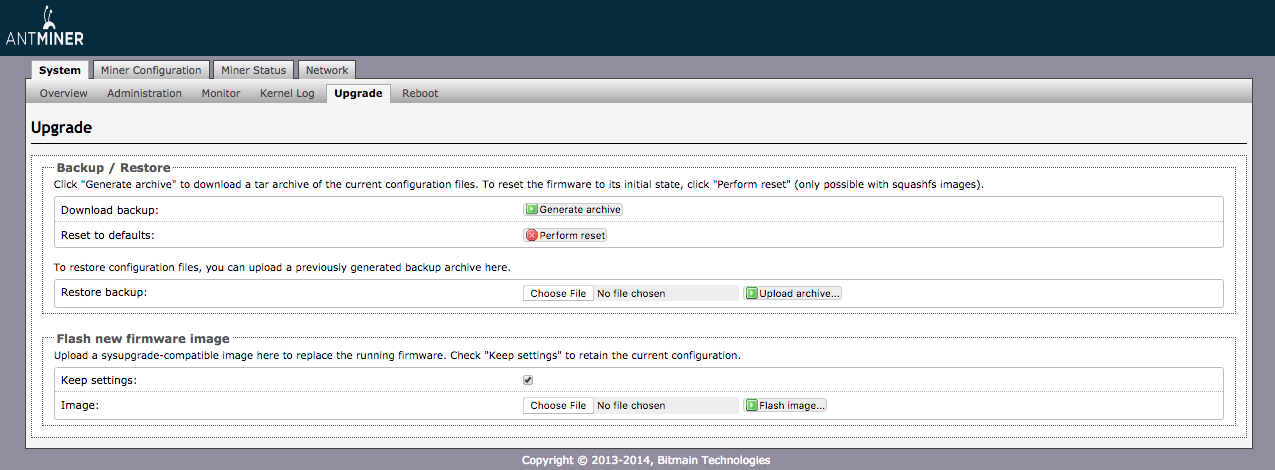
Go into the Upgrade tab, there you will see the Flash new firmware image section. Click the Choose File to choose the image you previously downloaded and then click the Flash image… button and wait for it to install.
If there is an error Cannot Find Signature!!!, then before flashing to Hiveon flash your ASIC with this file and repeat the process of flashing with the Hiveon firmware file.
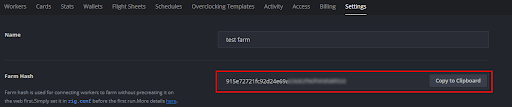
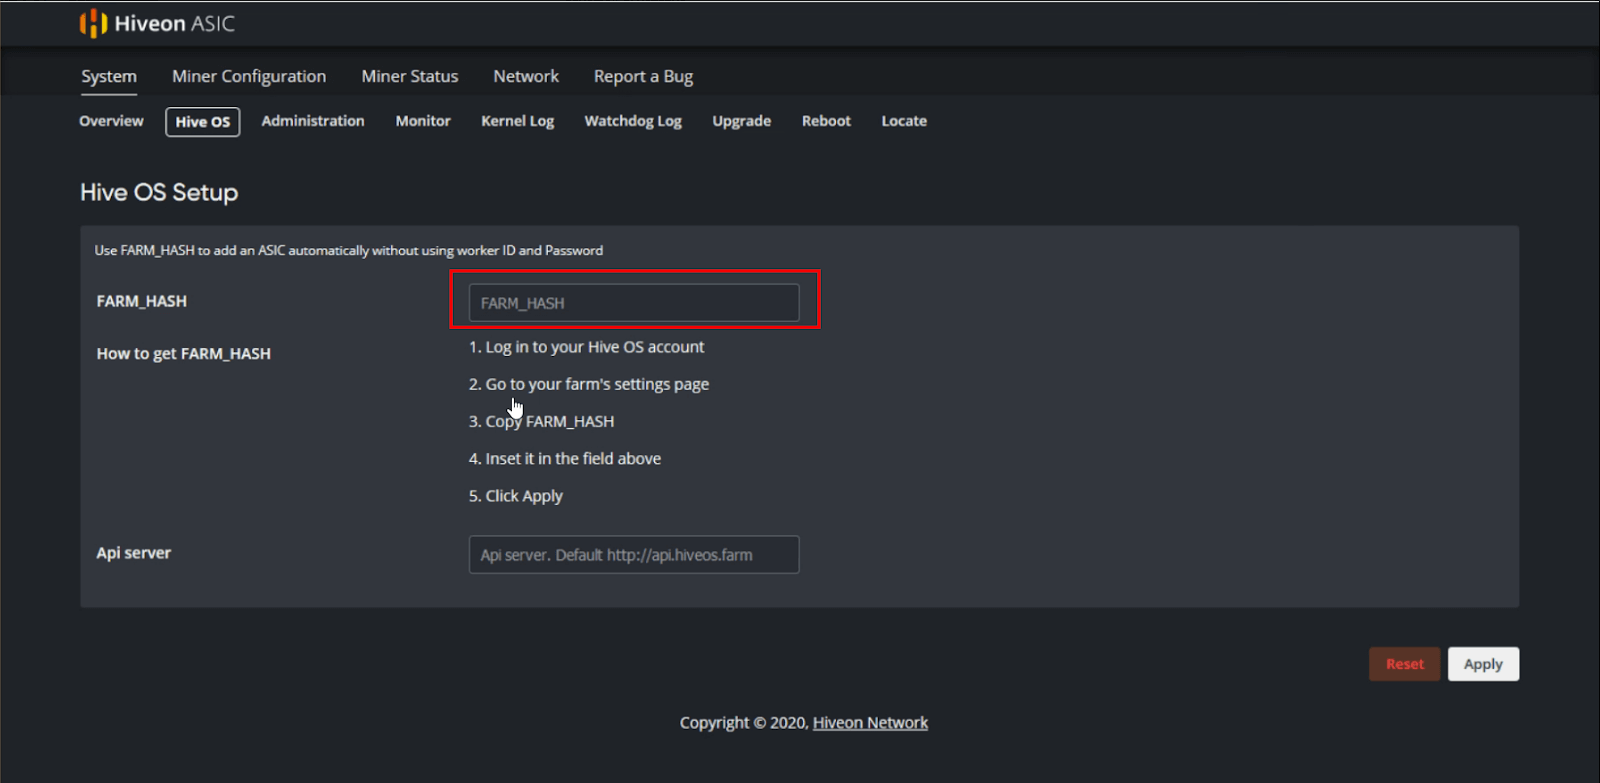
Now we’ll need to get your Farm Hash in the Hiveon OS web UI. Go to your farm’s Settings tab, there you will see your Farm Hash, copy it to clipboard.
As soon as the ASIC was flashed and rebooted, reconnect to it and go to the Hiveon OS tab in the System window. Paste your Farm Hash in to the FARM_HASH field and click Save & Apply. Your ASIC will be added to your farm in Hiveon OS.
You’re done, now you can configure your ASIC.
Option 2: Bulk Installation
To bulk install our firmware across multiple ASICs, use BTC_TOOLS. Indicate there the path to the Hiveon file.
If there is an error Cannot Find Signature!!!, then before flashing to Hiveon flash your ASIC with this file and repeat the process of flashing with the Hiveon firmware file.
Hiveon ASIC Auto Tuner Configuration
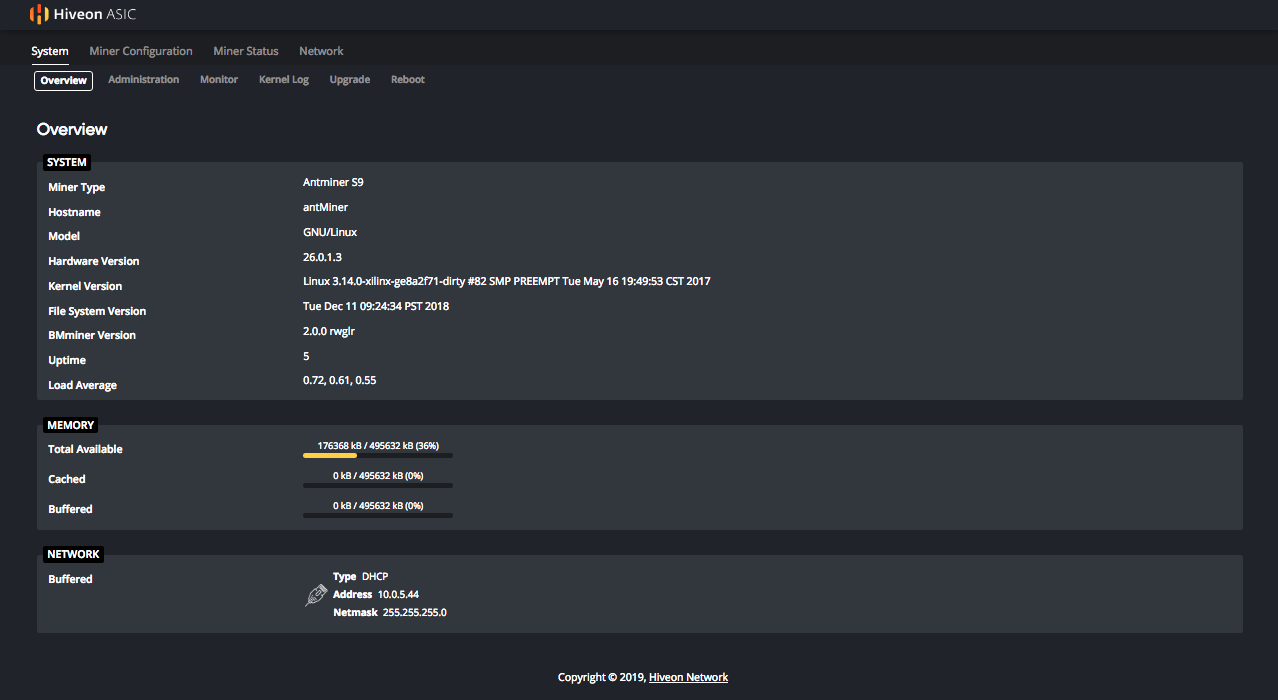
After installing the new firmware you can now login back into your ASIC miner. This time you’ll be greeted by the new Hiveon ASIC UI overview page. Lets look at Profiles and basic configs for the time being.
Attention! In order to use most of these options, you need to have a custom power supply connected to your ASIC. The factory PSU is not powerful enough to handle the load and your ASIC will turn off.
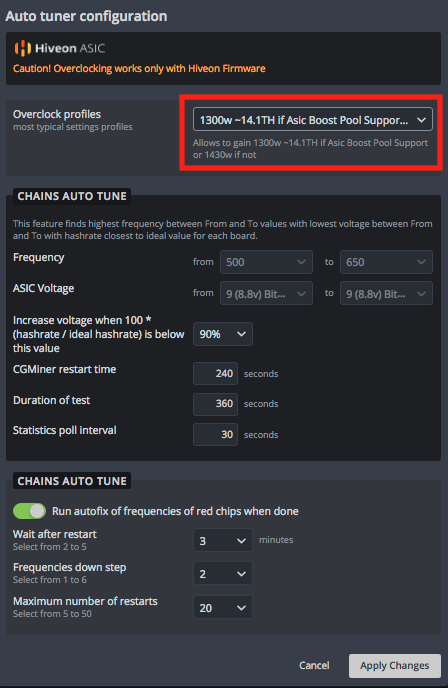
To choose the Profile you want, go to the Miner Configuration tab, then click the Auto tuner configuration tab. There you can choose the Profile that suits your needs best. A small disclaimer first: We don’t recommend choosing Manual mode unless you have sufficient skills in manually fine tuning an ASIC. We won’t be covering the manual procedure as this profile is too difficult to explain in a short comprehensive form.
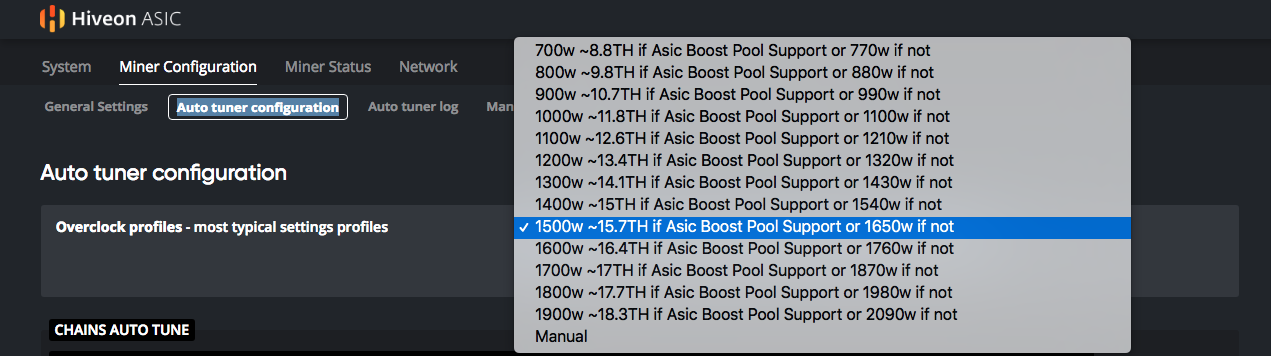
Then click the Apply Changes button at the bottom of the page and wait for the algorithm to finish auto tuning the ASIC. This may take up to an hour depending on the selected profile. Your hashrates may wildly fluctuate during the process — this is normal.
Updating Options
Option 1: Updating using Hiveon OS’s web interface
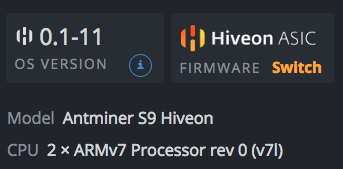
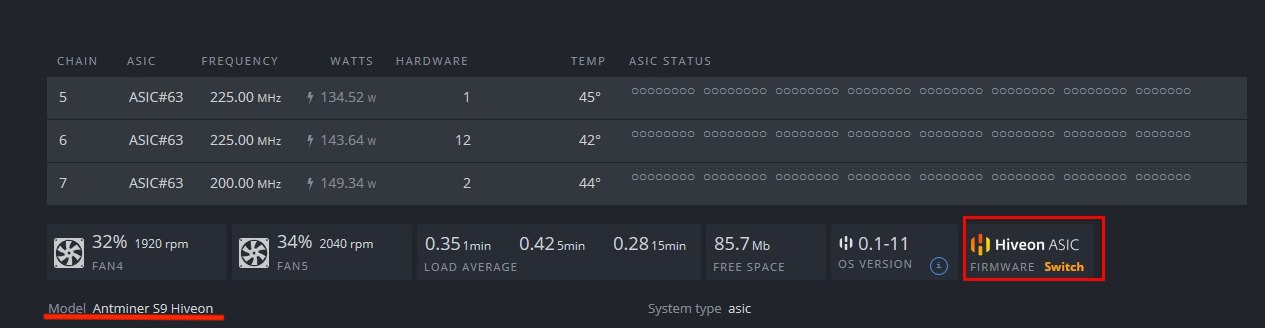
Assuming you’re already using Hiveon OS with your ASICs, you’ll need to update them to the compatible firmware first. If your ASIC model is compatible, you’ll see a yellow Switch text near the OS version at the bottom of your worker Overview page.
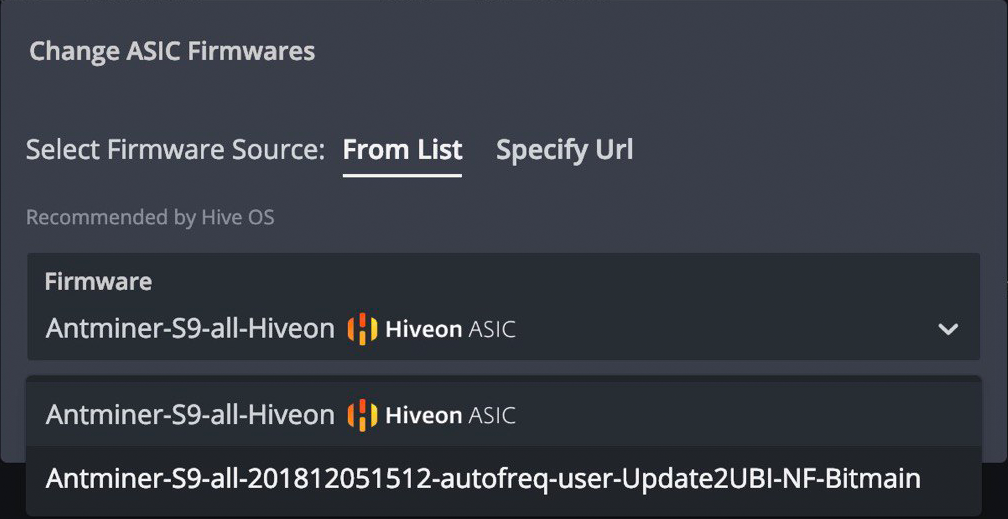
Click it and a new Change ASIC Firmware context window will pop-up. Then click the Select firmware dropdown list and choose the appropriate firmware version. In this example it’ll be the Antminer-S9-all-Hiveon (the process will be the same for L3+/L3++, just make sure you choose the appropriate file). Click Apply.
The ASIC will go offline and reboot, then it will re-appear as online shortly and it’s model name will change from Antminer S9 to Antminer S9 Hiveon (from L3+ to L3+ Hiveon accordingly). The firmware version will also change.

You’re done, now you can configure your ASIC using the auto tuner.
Option 2: Bulk Update
Assuming you’re already using Hiveon OS with your ASICs, you’ll need to update them to the compatible firmware first.
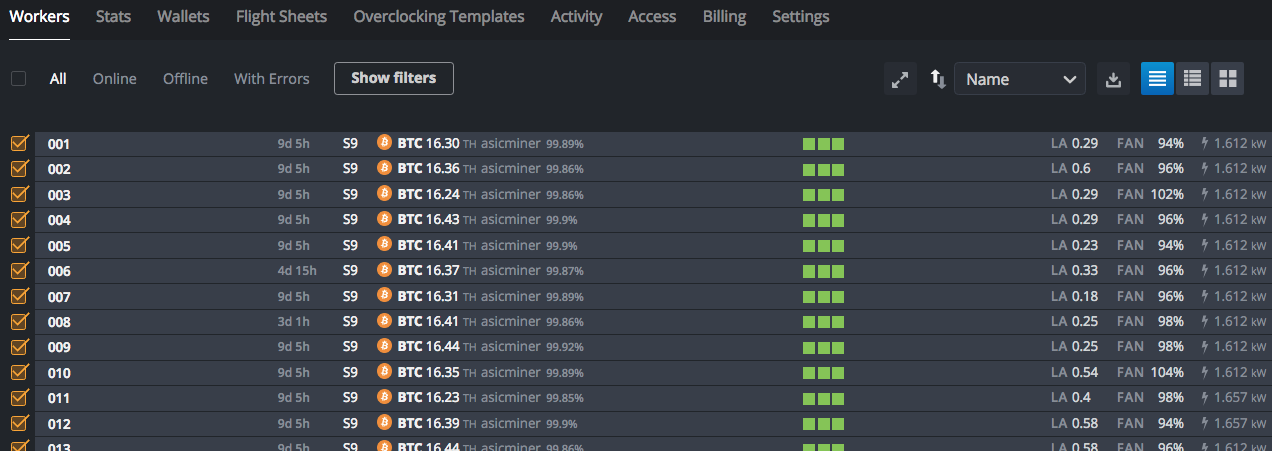
In the Workers tab, select the workers you want to update. You’ll see several actions appear in the top right corner of the screen.

Click the ASIC Firmware button and a new Change ASIC Firmware context window will pop-up. Then click the Select firmware dropdown list and choose the appropriate firmware version. In this example it’ll be the Antminer-S9-all-Hiveon (the process will be the same for L3+/L3++, just make sure you choose the appropriate file). Click Apply.

The ASICs will go offline and reboot, then they will re-appear as online shortly and their model names will change from Antminer S9 to Antminer S9 Hiveon (from L3+ to L3+ Hiveon accordingly). The firmware version will also change.
You’re done, now you can configure your ASIC using the auto tuner.
Hiveon OS web UI Auto tuner configuration
Once your ASICs were successfully flashed, you can then set our pre-created auto tuning profiles. There you can choose the Profile that suits your needs best. A small disclaimer first: We don’t recommend choosing Manual mode unless you have sufficient skills in manually fine tuning an ASIC. We won’t be covering the manual procedure as this profile is too difficult to explain in a short comprehensive form.
Attention! In order to use most of these options, you need to have a custom power supply connected to your ASIC. The factory PSU is not powerful enough to handle the load and your ASIC will turn off.
In the Workers tab, select the workers you want to run the auto tuning script on.

You’ll see several actions appear in the top right corner of the screen. Click the Overclocking button and a new context window will appear.

Select the profile you want then click the Apply Changes button at the bottom of the window and wait for the algorithm to finish auto tuning the ASIC. This may take up to an hour depending on the selected profile. Your hashrates may wildly fluctuate during the process — this is normal.
And you’re all done! Congratulations and happy mining!

